
Here you’ll learn how to build your own cluster.
Cluster
A cluster is a group of servers and other resources that act like a single system and enable high availability and, in some cases, load balancing and parallel processing.
Parallel applications require:
- Good performance.
- Low latency.
- High bandwidth communications.
- Scalable networks.
- Fast access to files.
This technology allows to increase the processing capacity using a standard in both hardware and software that can be acquired at a relatively low cost.
It is classified in:
- High Performance
Its objective is to execute tasks that require a high computational power, being able to execute during a long period of time.
- High Aviability
Its objective is to provide the maximum availability and reliability of the services, that is, it detects failures and recovers by itself.
- High Throughput
Its objective is to execute as many tasks in the shortest possible time.
And they need to be:
- Load Balancer
Is a device that distributes network or application traffic across a cluster of servers improving responsiveness and increasing availability of applications.
- Scalable
Setting up a Beowulf type CPU Cluster
Our cluster is named JCluster.
This guide describes how to build a simple cluster in Ubuntu.
We have 5 nodes running ubuntu server with hostnames: Jmaster, Jnode01, Jnode02, Jnode03, Jnode04 and Jnode05.
Configure our static IP
So first, we configure our IP, DNS on file /etc/network/interfaces.
We need a static IP for a local network in all of them (nodes and master).
#Ethernet for Jmaster
auto eth0
iface eth0 inet static
address 192.168.125.100
network 192.168.125.0
gateway 192.168.125.1
netmask 255.255.255.0
broadcast 192.168.125.255
dns-nameservers 8.8.8.8 8.8.4.4
Configure our hosts
Then, in all computers (nodes and master) edit the file /etc/hosts like this way:
On
JmasterandJnode0X:127.0.0.1 localhost #127.0.1.1 Jmaster 192.168.125.100 Jmaster 192.168.125.101 Jnode01 192.168.125.102 Jnode02 192.168.125.103 Jnode03 192.168.125.104 Jnode04 192.168.125.105 Jnode05
Configure our hostname
If you want, you can change your hostname on file /etc/hostname and then reboot your system.
Enabling Firewall
First, we need to check the applications that require conections:
sudo ufw app list
sudo ufw disable
Then, on master and nodes we should allows OpenSSH and NFS:
sudo ufw allow OpenSSH
sudo ufw allow nfs
sudo ufw enable
sudo ufw status

for more info, press here.
Managing users and groups
In all machines, we should create an user to manage the system.
Best way to create users and groups, Recommended:
Create/Delete new group:
sudo addgroup jclustergroup
sudo delgroup jclustergroup
Add/Delete user to a specific group or system (empty):
sudo adduser juser [jclustergroup/empty]
sudo deluser juser [jclustergroup/empty]
Add/Change password to user:
sudo passwd juser
For more information press here
Making secure connections
For this, we use OpenSSH.
OpenSSh is a free suite of tools that help secure your network connections (similar to the SSH connectivity tools).
sudo apt-get install openssh-server
sudo apt-get install openssh-client
Creating a public-private key
First, in all machines we use juser that was just created:
su juser
- Public key: Encrypt messages - transmitter (store in authorized_keys)
- Private key: Decrypt messages - receiver
Then we generate a RSA key pair:
ssh-keygen -t rsa
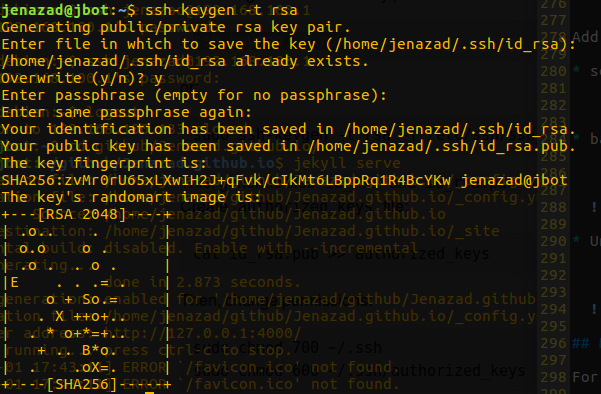
This, generate files id_rsa and id_rsa.pub on directory .ssh.
Create authorized_keys file:
cat id_rsa.pub >> authorized_keys
Then, change permissions:
chmod 700 ~/.ssh
chmod 600 ~/.ssh/authorized_keys
Finally, as superuser we need to configure /etc/ssh/sshd_config file.
First, make a copy and then modify:
sudo cp /etc/ssh/sshd_config /etc/ssh/sshd_config.original
Then, modify and add:
PermitRootLogin no
PubkeyAuthentication yes
PasswordAuthentication no
Port 254
# Time to log
LoginGraceTime 30
# any Host.
Allowusers Jremote
# just 192.168.0.25
AllowUsers Jremote@192.168.0.25
# any ip of the network 192.168.0.*
AllowUsers Jremote@192.168.0.*
# Jremote can connect from any domain, Jremota just connect from that domain
AllowUsers Jremote@*.pato.com  Jremota@ventas.pato.com
Now, we restart the service:
sudo /etc/init.d/ssh restart
Copying public keys to remote nodes.
Copying the public key to a remote host (nodes) as juser:
cat ~/.ssh/id_rsa.pub | ssh remotePC@remoteHost 'mkdir -p ~/.ssh ; cat >> ~/.ssh/authorized_keys'
Do the same in Jmaster and Jnodes0X.
Then, we can connect without password using:
ssh remotePC@remoteHost -p 254To copy files from remote to local (Download)
scp -r username@hostname:/path/to/file /path/to/destinationTo copy files from the local to the remote (Upload)
scp -r /path/to/file username@hostname:/path/to/destinationBy a specific port:
scp -r -p xxxx username@hostname:/path/to/file /path/to/destination
Making a Network Sharing System
The Network File System (NFS) is a client/server application that allows us to create a folder on the master node and have it synced on all the other nodes. This folder can be used to store programs.
Install on master or server:
sudo apt-get install nfs-kernel-serverInstall on node or clients:
sudo apt-get install nfs-common
Sharing Master folder
Make a folder in all nodes and master, our data and programs will be store in this folder.
So, as juser we make a folder and change credentials for nobody.
mkdir ~/forShare
This is optional:
Finally we change the credentials to
juser:sudo chown juser:jclustergroup ~/forShare
So, on Jmaster node as superuser, in file /etc/exports write:
# share forShare folder to any
/home/juser/forShare  *(rw,sync,no_root_squash,no_subtree_check)
- rw: read/write
- ro: read only
- sync: This applies changes to the shared directory only after changes are committed.
- no_root_squash: This allows root account to connect to the folder.
- no_subtree_check: This option prevents the subtree checking.
Then, run:
sudo exportfs -a
Now restart the nfs service:
sudo service nfs-kernel-server restart
sudo systemctl restart nfs-kernel-server
Mounting Master folder in nodes
In clients Jnode0X, create:
sudo mkdir ~/forShare
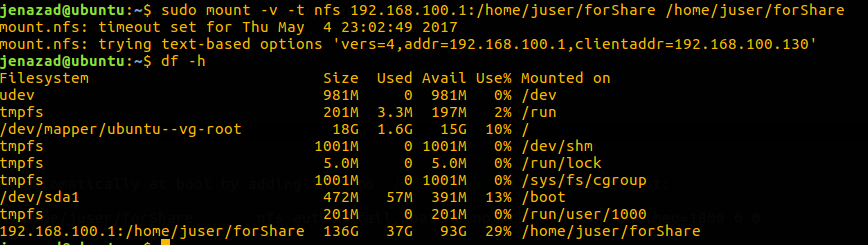
Then, we mount folders:
sudo mount -v -t nfs Jmaster:/home/juser/forShare /home/juser/forShare
Verify:
df -h
Mounting Master folder at boot
We can mount the remote NFS shares automatically at boot by adding them to /etc/fstab file on the client:
Jmaster:/home/juser/forShare /home/juser/forShare nfs auto,nofail,noatime,nolock,intr,tcp,actimeo=1800 0 0
Then, you just write on clients Jnode0X:
mount -a
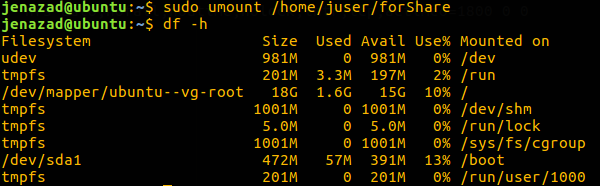
Unmounting folder
From clients write:
sudo umount /home/juser/forShare
Managing external connections
For manage this, we use Fail2Ban.
Fail2Ban is an intrusion prevention software framework that protects computer servers from brute-force attacks.
sudo apt-get install fail2ban
So, first we must modify /etc/fail2ban/jail.conf file:
Make a copy
sudo cp /etc/fail2ban/jail.conf /etc/fail2ban/jail.localThen modify
/etc/fail2ban/jail.localadding this:[ssh] enabled = true port = ssh filter = sshd logpath = /var/log/auth.log maxretry = 3 findtime = 600 bantime = 60
Then, we start/restart the service:
sudo service fail2ban restart
sudo service fail2ban start
Add to this, you can see the login fil on /var/log/auth.log.
see ssh-clients status and banned ip:
sudo fail2ban-client status sshban Ip ssh-client:
sudo fail2ban-client set ssh banip IPNAME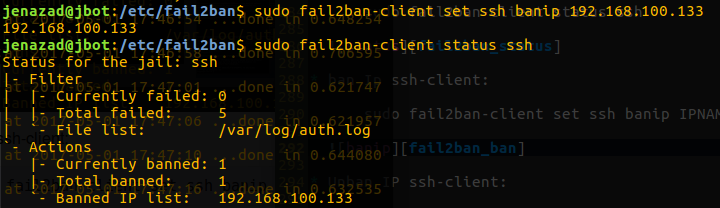
Unban IP ssh-client:
sudo fail2ban-client set ssh unbanip IPNAME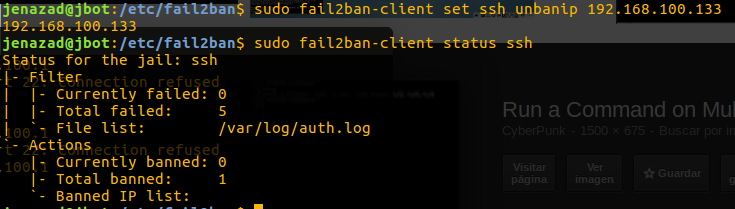
Managing all nodes at the same time
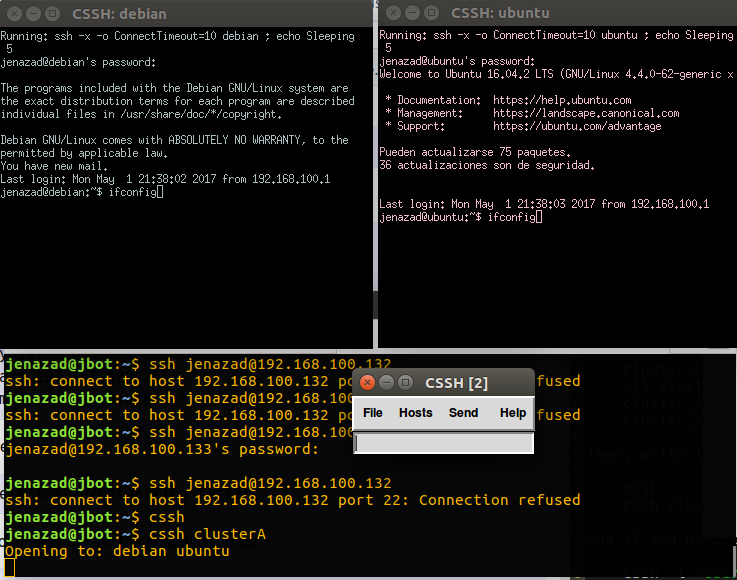
For this, we use clusterssh.
Cluster SSH opens terminal windows with connections to specified hosts and an administration console. Any text typed into the administration console is replicated to all other connected and active windows.
sudo apt-get install clusterssh
First, create a /etc/clusters file and next identify your clusters.
For example, we have 2 clusters:
JCluster_1, it have the machinesJnode01andJnode02.JCluster_2, it have the machinesJnode03,Jnode04andJnode05.
Then, in /etc/clusters file we should write:
clustersL JCluster1 JCluster2
JCluster_1 Jnode01 Jnode02
JCluster_2 Jnode03 Jnode04 Jnode05
Or in another form:
clustersL all
all JCluster_1 JCluster_2
JCluster_1 Jnode01 Jnode02
JCluster_2 Jnode03 Jnode04 Jnode05
Then, write in terminal:
cssh <clustername>
cssh clusterSL
And if you want to connect with a specific user, write:
cssh -l <username> <clustername>
Aplications
- We can implement a MPICH cluster for Distributed Computing using our
JmasterandJnodes0X.